I had purchased new bearings for the entire bike, and that includes the front and rear wheel. I also wanted to get the rear final drive mounted and the rear wheel installed, so that is the subject of this posting.
I began by cleaning up the front and rear wheels and then taking that and the tires to the dealer to mount. They did a mount and balance for about $90, and then it was up to me for the rest.
I decided to work on the front wheel first, so I began by cleaning up and re-installing the disc brake rotors as I had removed them to clean them up. They were in great shape, but had some surface rust and needed to be cleaned up. Once I had those installed I needed to drive in the bearings and seals for the front wheel. I had purchased the All Balls bearing kit for the bike, and it includes the seals as well as sealed bearings for the front, so it was a complete kit.

I drove in the first bearing using a bearing driver and then a socket of applicable size. I then needed to properly place the center collar and then install the second bearing and seal. The pictures below show only one side of the bearings and also the seal for the Speedometer side of the wheel. This side has a larger seal to accommodate the speedometer drive. Once I had the seals installed and the speedometer drive ready to mount, it was a simple task of preparing the front axle for installation. I also needed to find the axle holders as I had powder coated them. Once found I installed the wheel and axle and then torqued the axle holder bolts to the proper torque, and the wheel is installed. All that remains for the front are the brakes and fender, etc.
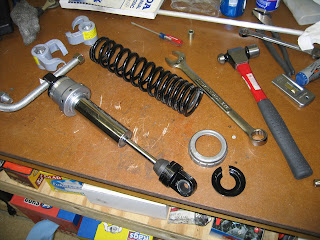
For the rear end, this would require I install the final drive, build and install the rear brakes, and also install bearings in the rear wheel. I also wanted to install the center stand so I could take the bike down from the stand I had it resting on. The first thing I did was to mount the center stand. I had this powder coated and it looked great with no rust on it at all. I had also purchased a new spring as the old one was rusty and not in good shape. The installation went very well and I even mounted the down-tube holder for the breather tube. The spring was a bit of a hassle to install, but once in the entire bottom end looked great as you can see from the photo's.

Next I did the rear wheel - the tire was already installed and I had just done the front, so I had some readily available knowledge about driving bearings. That went very well and there aren't seals to drive so it goes well. One thing to note here is that I had purchased the All Balls kit for the rear as well. It comes with three bearings but you only end up using two of them. I had sent them an e-mail asking why they send it out with three bearings, and they told me they send it that way so that the one kit can accommodate more bikes. Whatever. I also installed the rear drive gear to the rear wheel as I had removed that for cleaning. It was also very greasy and the bolts were showing a bit of corrosion from sitting, so I was able to clean them up and they looked great.
Next I grabbed up the Final Drive to clean up and install. I hadn't wanted to tear this apart as it had very few miles on it and upon inspecting the gears and the other mechanisms it looked to be in great shape. This was a bit greasy and dirty, but it cleaned up very well. I also drained the gear lube from the case and it looked to be in fairly good shape and not dirty at all. I flushed this out with new lube so that it was coming out clean. I will refill it once I have the bike sitting properly on the ground. I then installed the drive. There are only three bolts holding that to the swingarm and they install and torque easily. I also connected the left side rear shock to the final drive.


Next I pulled out the rear brake panel to install pads and get that ready for installation. I had powder coated the rear panel and it looked great. I installed a new set of Vesrah brake shoes and also new Honda springs, retainer, and cotter pins. With that together I only needed to clean up the rear axle and I was ready to install the rear wheel.
 The rear wheel is very easy to install and remove. Simply loosening and removing the axle is very easy, and then the wheel pulls from the final drive and it is off. Installation is the reverse. I began by placing the rear brake panel and brakes into the rear wheel, and then pushed the rear wheel into place on the final drive. I installed the space between the brake panel and the swingarm, and then installed the rear axle. This involves driving this from the right to the left side of the wheel and then installing the axle nut on the left hand side. Then you must torque this nut and the pinch bolt on the right side and voila, the wheel is on. I haven't hooked up the brakes or anything yet, but as you can see from the photo below it is looking good.

Next I will begin to work on the airbox and rear fender, as I need to remove the wheel to install those. I'll post more pic's as work progresses. Thanks for looking.


 Notice the broken fins and dirty corroded and scuffed valve and side covers. When I disassembled the engine I planned to also replace the valve cover and side covers, or polish and refinish them. Disassembly went quickly and honestly was done in about 2 hours. I had done an rebuild before and it goes quickly when you have some experience. I bagged up and labeled all the parts and prepared to clean up and refinish the engine cases.
  Once repainted I began reassembly. There are a few photos below that show some of the stages, but mostly this was a fairly simple process if you follow the manual. Notice the nice new finish on the outer cases and cylinder. Also notice the new copper gaskets on the bolts that hold together the top and bottom cases.


 I then went to work on the swingarm. The swingarm had been powder coated and looked great. I needed to install new bearings as the old ones had been removed. This is all part of the plan to have 100% new bearings in this bike once the build is done. I purchased the required bearings from a dealer so they are 100% Honda parts. It was more expensive than I would have thought, and I definitely recommend not doing this unless necessary as for the price it is a small amount you are gaining by having new bearings. The ones I removed were in decent shape and I saved them in case I needed a replacement set down the road.


 With the swingarm mounted I then installed the rear shocks so the swingarm could be held in place. Only the right shock connects directly to the swingarm. The left shock connects to the drive gearbox portion of the swingarm when that is installed. That is the next thing on my list to do, and then mount the front and rear tires. Here is what the swingarm looks like installed:
 That is all for now. I plan more work tomorrow and hope to have a rolling chassis by the end of the day - I guess we'll see. Talk to you then.